
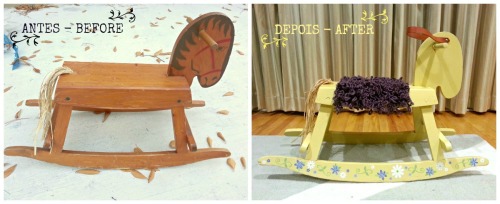
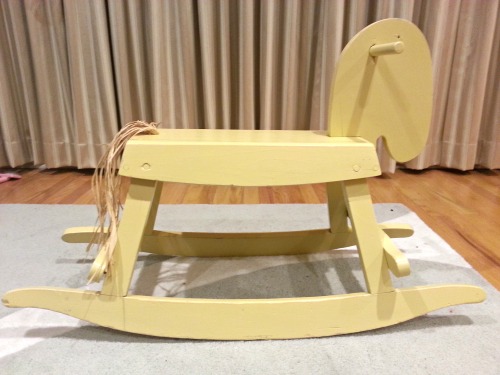
ANTES – BEFORE
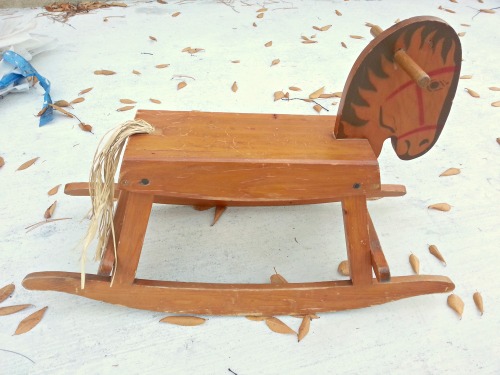
Este cavalinho de balanço é muito fofo e de excelente qualidade, só estava precisando de uma reforma para dar uma restaurada no visual! Fiz questão de reformá-lo para dá-lo de presente de Natal para uma baby girl super especial, Angelina! E hoje, vou compartilhar com você a experiência deste projeto! Junte-se à mim e encontre algo na sua casa que esteja precisando de um retoque! Vamos lá?
This lovely rocking horse needed some repairs and a nice makeover! I wanted to give it to a lovely baby girl, Angelina, as a Christmas gift so I “rescued” him and had a lot of fun redoing it and today I will be sharing with you my experience! Join me and find something in your house that is in need of a makeover! haha.
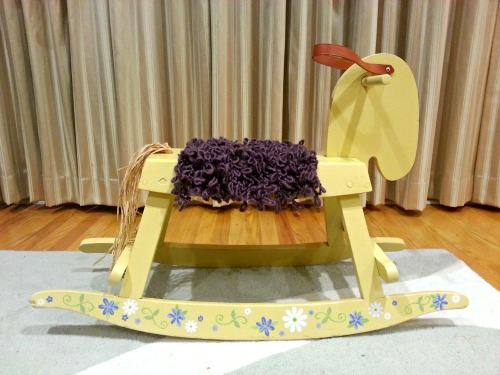
DEPOIS – AFTER
MATERIAIS – MATERIALS
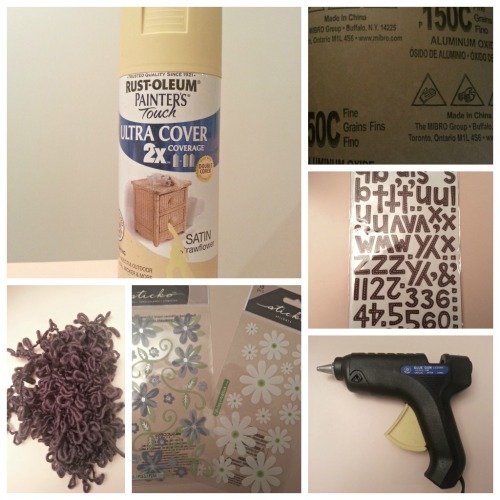 Eu usei quase um rolo dessa lã encaracolada (tipo enroladinha no tom lilás), uma lata de tinta spray (amarelo fosco, quase bege), adesivos de letras e flores, cola quente e uma lixa.
I used almost one skein of that fluffy loopy yarn(purple), one can of spray paint (satin light yellow), stickers (alphabet & flowers), hot glue and sandpaper.
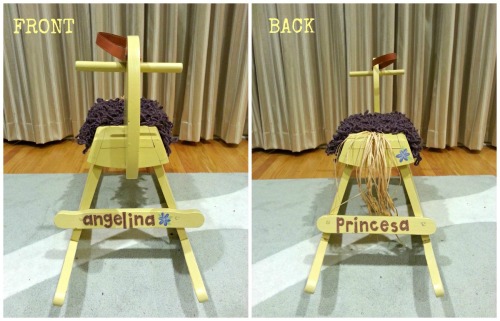
O processo foi super simples! Primeiramente, eu lixei o cavalinho, limpei os resíduos e o pó provenientes do lixamento(esta parte do processo é muito importante pois, tinta só fixa bem em madeira limpa). Em seguida, veio a pintura(deixei secar por uma semana aproximadamente) e colei os adesivos. Para o assento, eu simplesmente passei a cola quente fazendo um “zig-zag” e fui colando a lã somente na parte de cima do cavalinho e deixei as laterais soltinhas, o que eu amei porque deu um acabamento super delicado e caidinho!
The whole process was very simple! First of all, I sanded the horse and then I cleaned up all the dust caused by sanding it (this is a critical step because you want to make sure the paint will stick well to the wood). Once I finished cleaning it up, I spray painted the horse and let it dry for about a week. After a week, the wood has absorbed the paint completely and now it’s time to decorate it ( love this part!) Then, I applied the letters and flowers stickers. To add the comfy loopy yarn, all I did was apply the hot glue doing a “zig-zag” movement and sort of pressed the yarn against it to make sure all the spaces were filled. I did not apply hot glue on the sides so that the loopy yarns would just fall on the sides. And it’s done!
E então, vocês gostaram?
Beijos e até a próxima!
Did you like the makeover?
See you next time!
